Thursday, May 21, 2009

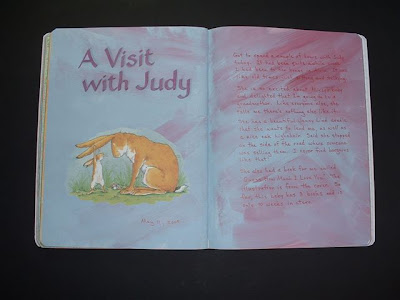
Visit with Judy


I got to spend a couple of hours with Judy today. It had been quite awhile since I had been to her house in Alvin, since they spend most of their time now in Huntsville. It was like old times just sitting and talking. She's the first friend I made when we moved to Alvin in 1963.
She is so excited about Missy's baby and delighted that I'm finally going to be a grandmother. Like everyone else, she tells me there's nothing else like it.
She has a beautiful Jenny Lind cradle that she wants to lend me, as well as a nice oak highchair. Said she stopped on the side of the road where someone was selling them before Emily was born. I never find bargains like that!
She also had a book for me called "Guess How Much I Love You." The illustration here is from the cover. So far, this baby has three books for Emme to read to it and is only 10 weeks in utero.
These pages were painted with "Winter Blue" & "Wine." The title was written with a Marvy calligraphy marker No. 64 from the Victorian set. The text was written with a "Spice" Zig Writer.

Mother's Day 2009


The flowers on this page are from the stamp that I used on Granny's card, but on it I placed them in more of a horizontal line, although they still over-lapped. And I used watercolor pencils instead of the waxy Prismacolor pencils that I used here.
Missy and I spent the afternoon together. It was extra special this year since she's on the way to becoming a mother herself.
I adore the gift she made for me. It's a wooden picture frame painted light blue. Sage green wooden letters spell out the words "Emme & Me." At first, when I just had a cat as a grandchild, we referred to me as "Me-Me." My name is Marian Eliece...thus the ME. However, Jerry's mother, who already has a number of grandchildren, is called that. Plus, that's what my sister Jan is called. So, we had to think of a different appellation. Missy's friend Leigh suggested "Emme" which is what the individual letters "M" and "E" sound like. I think it's cute and kind of unique. Of course, you never know if a child will come up with something on their own!

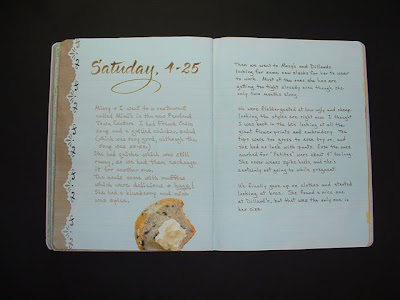
Muffins


These pages were very simply painted with "Ice Blue" paint.
I cut the border with a Multi-Punch manufactured by The Paper Studio. This particular style is called "Elegant." Since the cut-off part allows the previous page to show, I decided to use that brown color for my writing. A Pitt brush marker was used for the title (pooh! I left out a letter.)
The left page was written with the bullet end of a Tombow marker, and you can probably see how the letters did not stay crisp. I love the brush ends of these markers, but the opposite tips on them seem to always bleed when used over acrylic paint. I need to remember that when I consider using them on my journal pages. For the right page, I used a brown Pitt F pen. Notice how much sharper the writing is.

April Showers


This spread was a combo of several experiments, and I'm pleased with how it turned out.
I painted the pages with midnight blue paint, using my brush to create swirls and while it was still wet, I used the pointed end of a bottle opener to draw loop-de-loops in the paint on the right side.
Next, emulating a technique that I learned here: http://web.me.com/jwesolek/cre8it/Blog/Entries/2009/4/17_Artist_in_the_Kitchen_-_Food_for_Thought.html I cut some frames from fun foam.
Stamped them with "Crafter's Ink" by ColorBox. The green one didn't show up very well on the dark blue paint, so I enhanced it with a green Prismacolor pencil. I also used that pencil to write the numbers and the words "April Showers." Retraced them with a white pencil, which is what I used, as well, to write the text.

Easter Week


I spent Wednesday, Thursday, Friday and part of Saturday in Huntsville. I met Judy at a shopping center in Conroe. She showed me an OshKosh outlet there that has fantastic discounts on kids' clothes. She's as excited as I am (almost) about Missy's baby. Then she treated me to a wonderful lunch at the Hunan Chinese restaurant.
When we go to their house on the lake, I was bowled over by how beautifully they have landscaped their yard. The azaleas were still in bloom, and they also had some daffodils in pots and dozens of ferns. There were yellow irises all along the edge of the lake.
She introduced me to a friend of hers named Sylvia Gintz, and as we talked, we discovered that she had lived in Nacogdoches as a little girl, just one street over from me. She was a year ahead of me in school and as far as I know, I never met her. They moved away after second grade.
On Friday, I showed Judy how to make doodle-art flowers with Tombow brush pens. She had been wanting to learn this for a long time, ever since she wasn't able to take the class I taught at Novel Approach.
I used light gray and deep lilac paints for these pages. The borders were created with strips of scrapbooking paper, while the Easter eggs were cut out of an advertisement. Wrote the title with a Pitt brush marker.

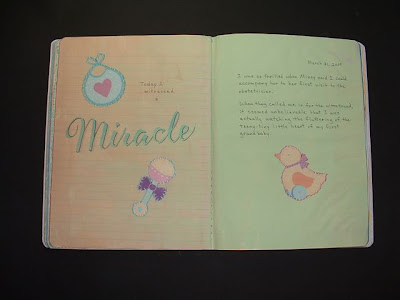
Miracle


I was so thrilled to be able to accompany Missy on her first visit to the obstetrician.
When they called me in for the ultrasound, it seemed unbelievable that I was actually watching the fluttering of the teeny-tiny little heart of my first grandbaby.
This background was painted with "Latte" and "Soft Apple" paints. I cut the illustrations from some gift wrap I had left over from a baby shower.
I wrote the word "Miracle" with a green Tombow brush marker, shadowed the right side of the strokes with a light gray marker, and separated those strokes with a fineline black Prismacolor pen.
When you create shadowing for your letters, you need to decide whether to do it on the left or right side of the strokes, and be very careful that you stick with whichever side you've chosen.

Generations


I wanted to come up with a clever way to tell Mother that Missy is expecting a baby. I looked and looked and finally found a small silver frame that was hinged with room for three photos. I put my baby picture in the first spot, followed by Melissa's. I had never before noticed how much we resembled each other as infants. I knew that we looked alike as 2-year-olds, but I guess I'd never looked at these pictures side by side before.
I wrapped the frame and told Mother that we'd brought her an Easter gift, although that was still two weeks away. She was intent on looking at the photos, so it took her a minute to realize what the message in the third place really meant.
Jeanne caught on at the same time and just started hollering and crying and hugging. I know it must have pleased Missy so much to see how happy Jeanne is for her. My reaction had been much more low-key since I knew she had gone off the pill and I wasn't so shocked when she told me.

Grandbaby!


This spread records some of the best news I have ever received.

Wednesday, May 20, 2009

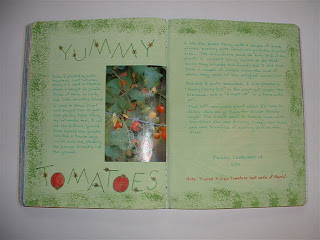
Yummy Tomatoes


Every spring I try my hand at planting tomatoes. Sometimes I have fairly good results, and sometimes not so hot. I once heard someone joke that their first home-grown tomato only cost them $100.
After painting the pages with lime green paint, I used a holey sponge to apply a darker green paint as a border. Wrote the title words with a medium size Prismacolor pen, and used a smaller nib to add the little flowers. Colored with yellow and red Prismacolor pencils, as well as using a green one to shade the right sides of the letters.

Australia


These pages were painted with Periwinkle, and when dry I used Bright Yellow paint to stencil the stars down the side. They were outlined with a .01 Prismacolor pen. These pens are relatively new to the market I think, at least they are new to me. I bought a set of them at Hobby Lobby and the sizes of the nibs range from a tiny .005, to .01, .03, .05, and .08. Any of you who've done much writing on acrylic painted pages, know that not every pen works well on this surface. Or, if they work well at first, the paint seems to ruin them after a short while. So far (and I'm keeping my fingers crossed) these pens seem to be holding up. There is a guarantee on the back of the package that says: "If your product does not perform properly, please return for replacement" and gives an address. I plan to take them up on this if one quits any time soon.
I have used Prismacolor pencils for many years, and my set was bought back when they were manufactured by Berol. I've heard some people say they don't like them as well since Sanford began making them in 1995, but I can't really speak to that.
I wrote the word "Australia" with a Pitt F pen, and I promise you that is one pen you can count on! Then I colored in the counters of the letters with soft pastels.
The picture was from a review of the movie in the newspaper, and I just drew a frame around it with a yellow Prismacolor pencil.

My Birthday Week


Squirted on Calypso Blue and Lime paint, moving it in swirls with the brush, and leaving bits of white paper exposed. Stamped around the edges with white pigment ink. Used a broad-edge marker to create the capital "D", and embellished it with a white Sharpie Poster-Paint pen. The moon and stars on the right side are rubber stamps applied with white pigment ink and enhanced with Prismacolor pencils.

Oct. 6


This is an interesting technique. I placed a plastic stencil under the right page and rubbed the unpainted page with the sides of red, blue & yellow crayons. Then I over-painted with Americana's "Graphite", which is a medium gray paint. I wiped the wet paint with a baby wipe to expose the crayon colors which had resisted the paint. As you can see, the holes in the stencil had resisted being filled in by the crayons, and left bare paper that the paint covered up.
I used white FW acrylic ink and a Nikko nib to write the text.

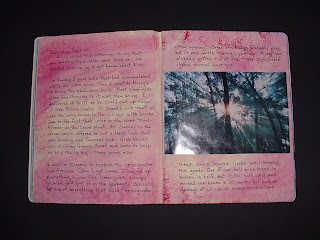
Now the Clean Up Begins


This page had been prepainted with Melted Butter and Fuschia and I was pleased how it complemented the streaks of sunlight coming through the trees in the photograph. This was just a picture I had in my files, but it illustrates the feel of the hurricane in so many ways. As I stare at it, I can imagine how hard the wind must have blown to create the havoc that we saw in all the yards as we drove back down the streets toward home. I've never been in a war zone, but that word came to mind as I ogled the piles and piles of debris. Trees, vines, leaves, and limbs are littering all the yards and most fences are down. Brush is piled 12 feet high. But, oh how lucky we were. It's a major inconvenience being without TV or Internet, but our electricity was back on several days before our neighbors' was, and we didn't even lose one shingle, while thousands had to have their roofs replaced, not to mention those poor people right on the coast who lost their entire houses and some of them lost their lives, as well.

Hurricane Ike continued


These pages had also been prepared earlier as I was continuing to play around with this same stencil. For the background, I first painted with "Melted Butter" which is a very pale yellow, and then overpainted with Periwinkle, Robin's Egg, Morning Blue & Winter Blue. Look carefully, and you'll see where I glued an old dictionary page on the right side and dabbed more color on top of it. When this was good and dry, I positioned the stencil with temporary adhesive and sprayed it with shiny black paint. Then I embellished the figure with acrylic paints. You can click on the picture to enlarge it for a better look.

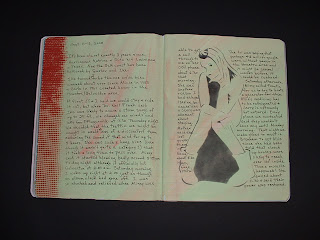
Waiting Out Ike


This is a spread that I completed while we were at my sister's house in Pflugerville just outside Austin. The background and stenciled girl had been completed sometime before the storm, and the disgruntled look on her face seemed perfect for how we felt as we waited to find out how bad things were.
I made the stencil by taping a piece of transparent vellum over a magazine photo and tracing the girl. It takes a bit of practice to figure out what parts to cut out. Of course, the black parts you see here are where the holes were cut. Sometimes, I use spray paint for my stencils, but for this one I sponged on black stamp pad ink.
The lefthand border was made but laying down a strip of drywall mesh and sponging with Tuscan Red paint.

July 12, 2008


I've been very remiss in posting pages to this blog. I can't believe it's been 10 months. For much of that time I was occupied with developing some PDF files that explain how I go about making my art journal pages. Lots of this I've already explained on this blog, of course, but the lessons that I sell are in a much more organized 1,2,3 type fashion. To read more about them, look here: http://creatingyourownstory.blogspot.com/
This page is less than spectacular, but it illustrates how you can create writing lines with corrugated cardboard. After the blue and green background paints were dry, I brushed red paint onto a piece of narrow-ribbed cardboard that was inside a package of Reveal light bulbs. (Unfortunately, they seem to have discontinued using it, but Starbuck's has something similar around their cups.) Anyway, you need to quickly press the painted cardboard to the page before it has time to dry.
The small picture is from a paper napkin.